Export Deal Data
This guide provides step-by-step instructions on how to export data using the export tool. By following these steps, users can easily export data with the option to filter by their chosen lender, application number, approval date, closing dates, application entry date, maturity dates, rate type, net rate, and more. This guide is useful for anyone who needs to export data for analysis or record-keeping purposes.
Video Walkthrough
Step-by-Step Guide
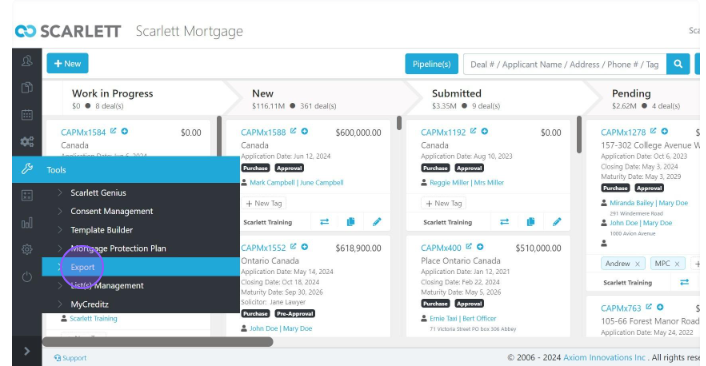
1) Click "Export" Under the Tools Section of the Sidebar
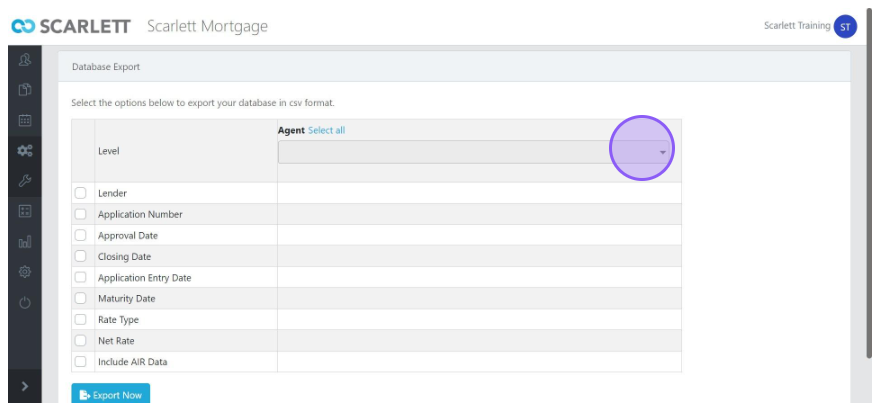
2) Click Agent Taskbar to choose an Agent
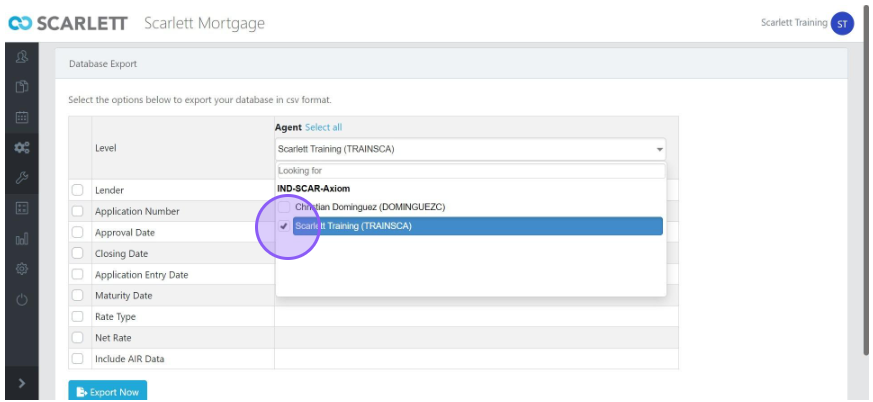
3) For example, here we picked the Scarlett Training Account
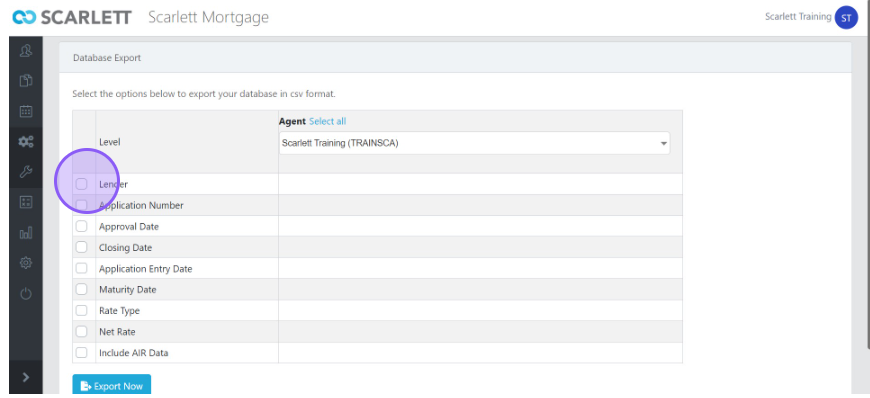
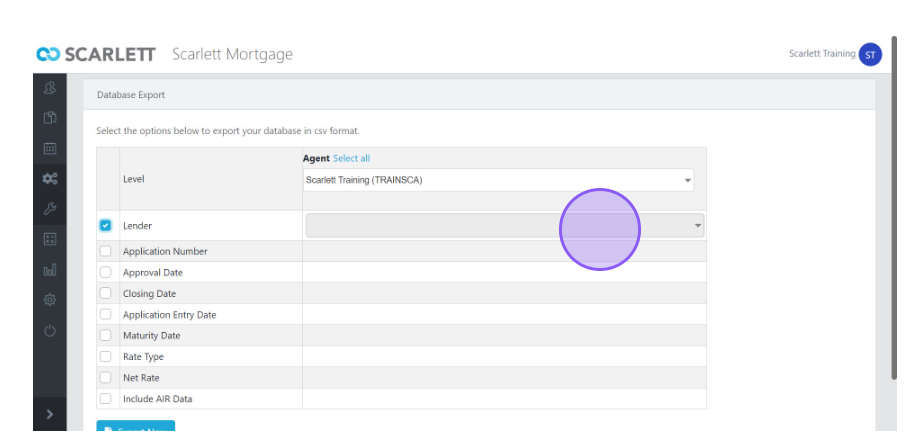
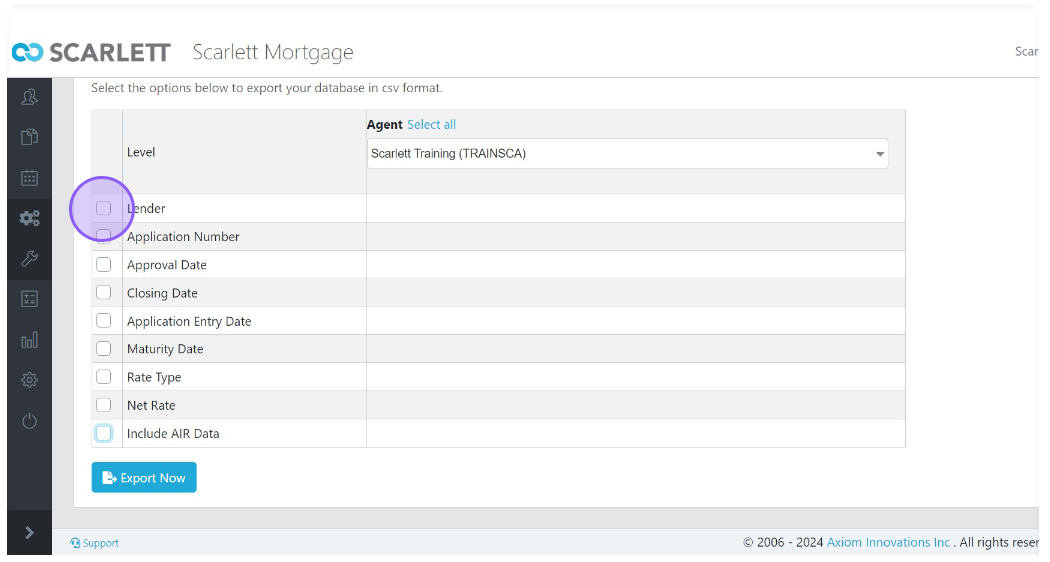
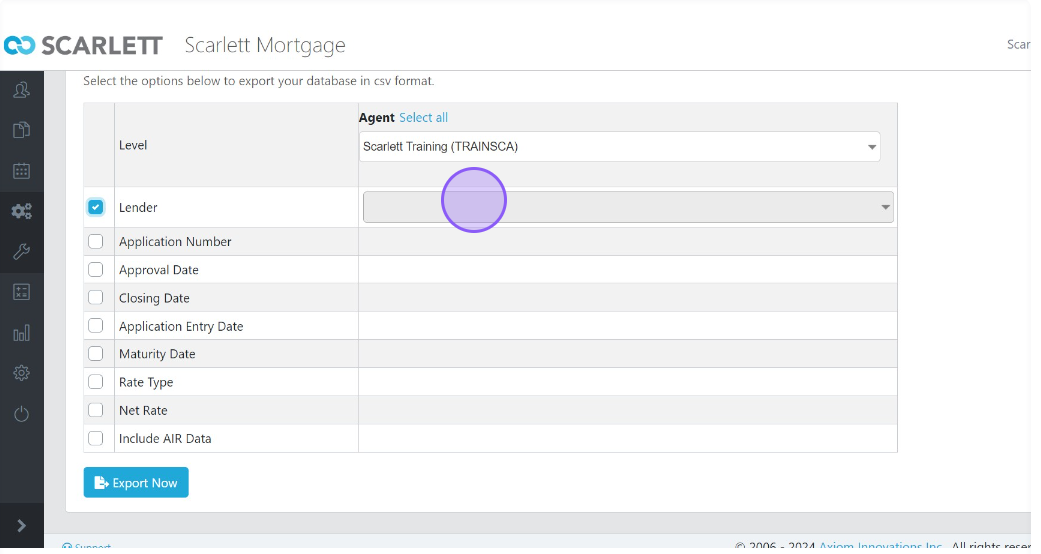
4) To find the Lender, click the Lender box
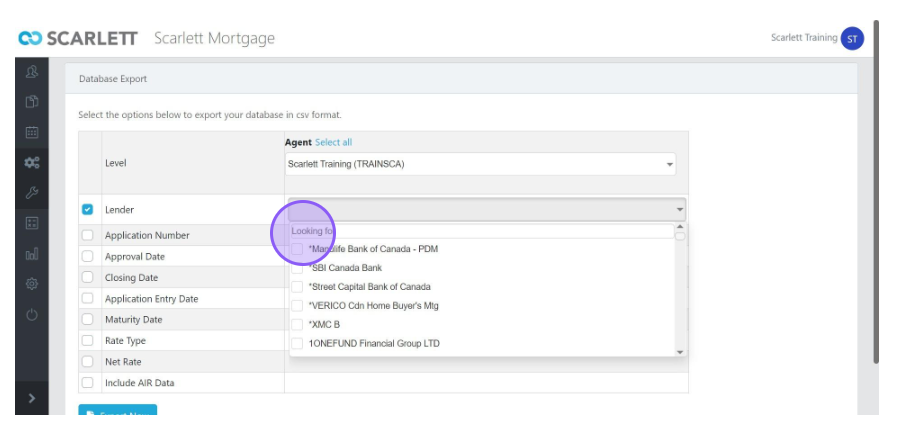
5) Click the Lender Dropdown
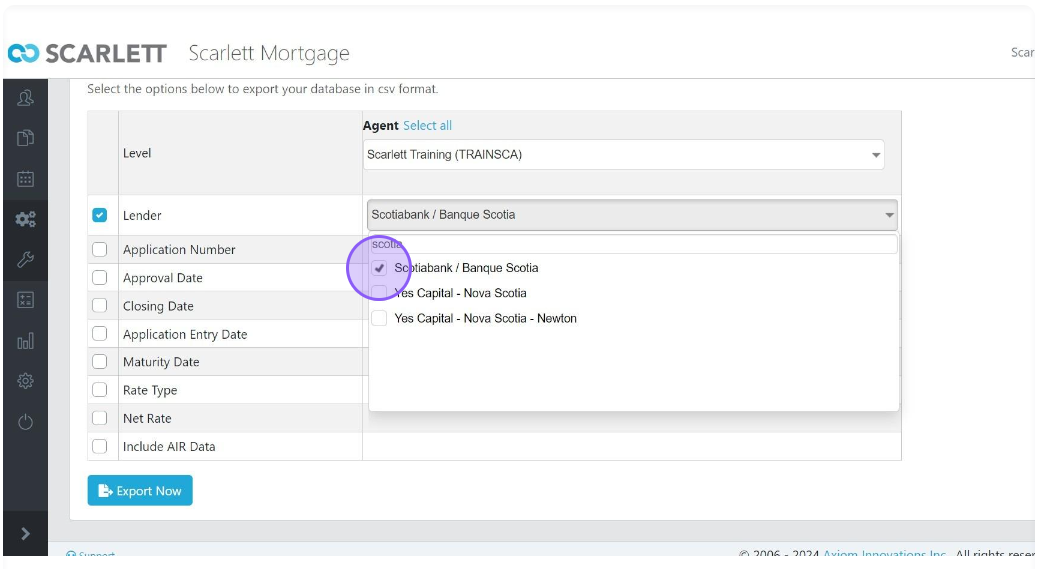
6) You can scroll through available lenders or search for a lender
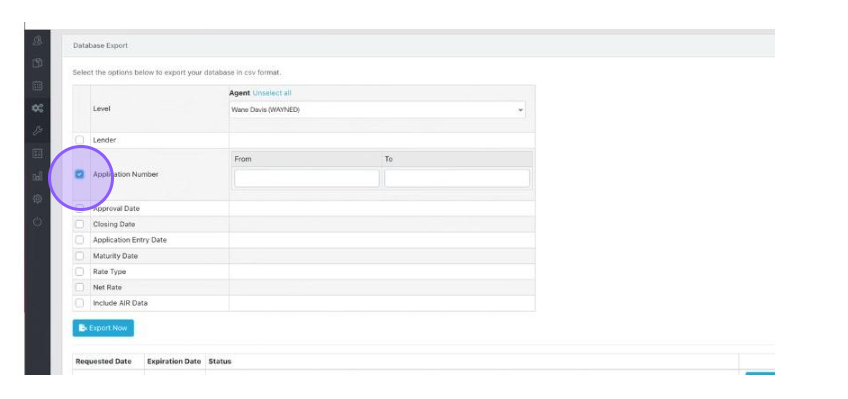
7) Click here for Application Number
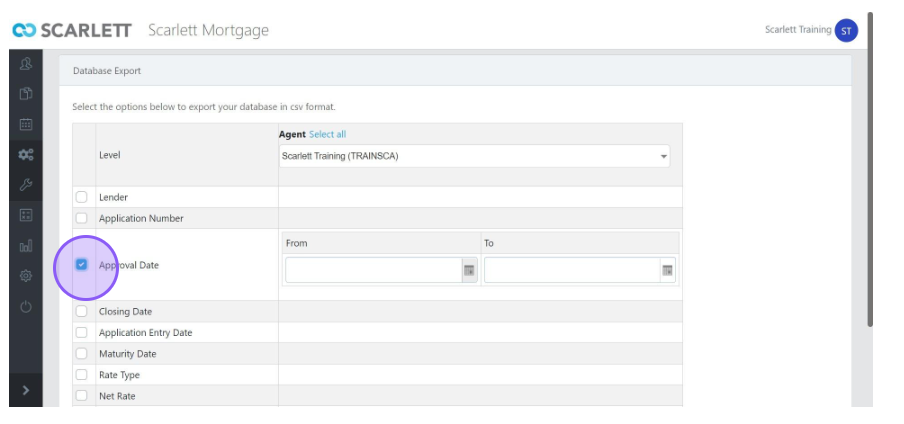
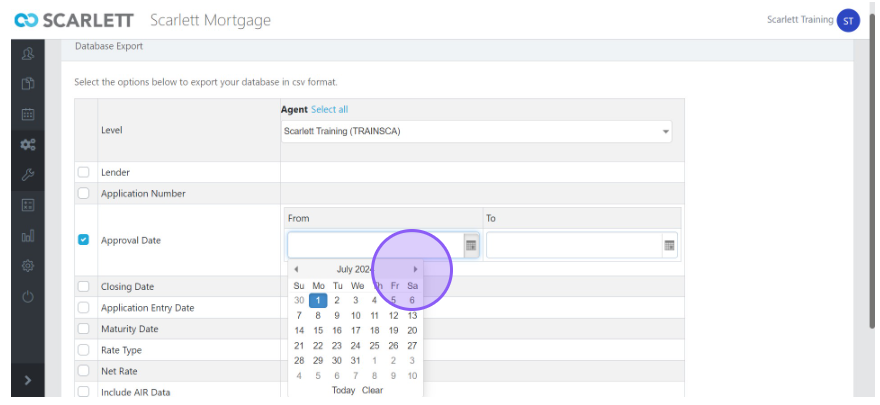
8) Click this box to find the Approval Date
9) This opens a Calendar which allows you to scroll through dates
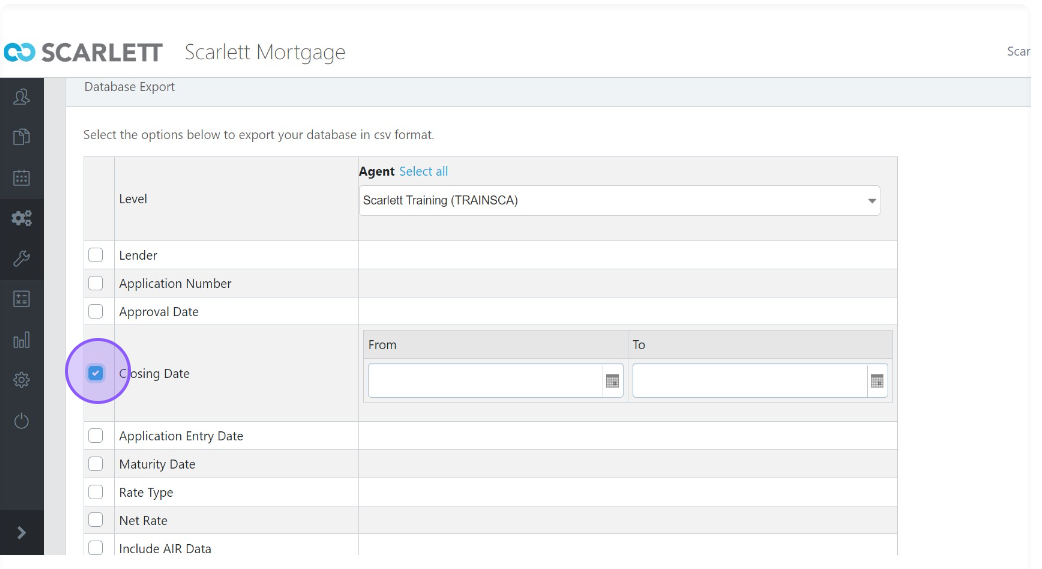
10) Click here to look through closing dates
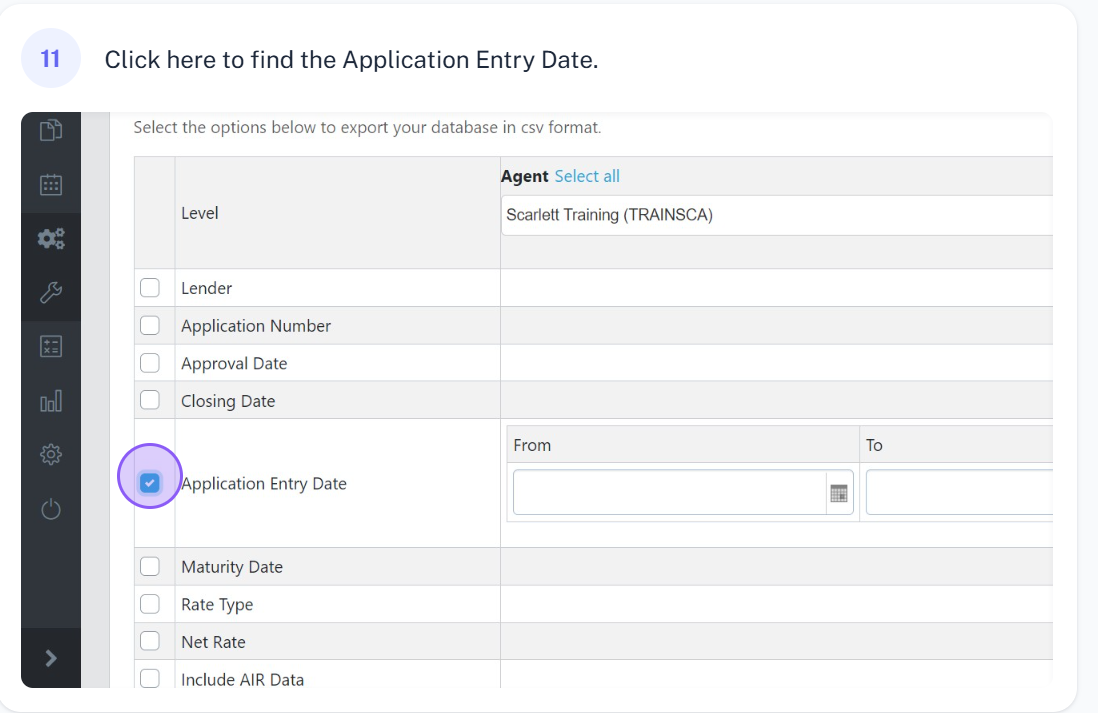
11) Click here to find the application entry date
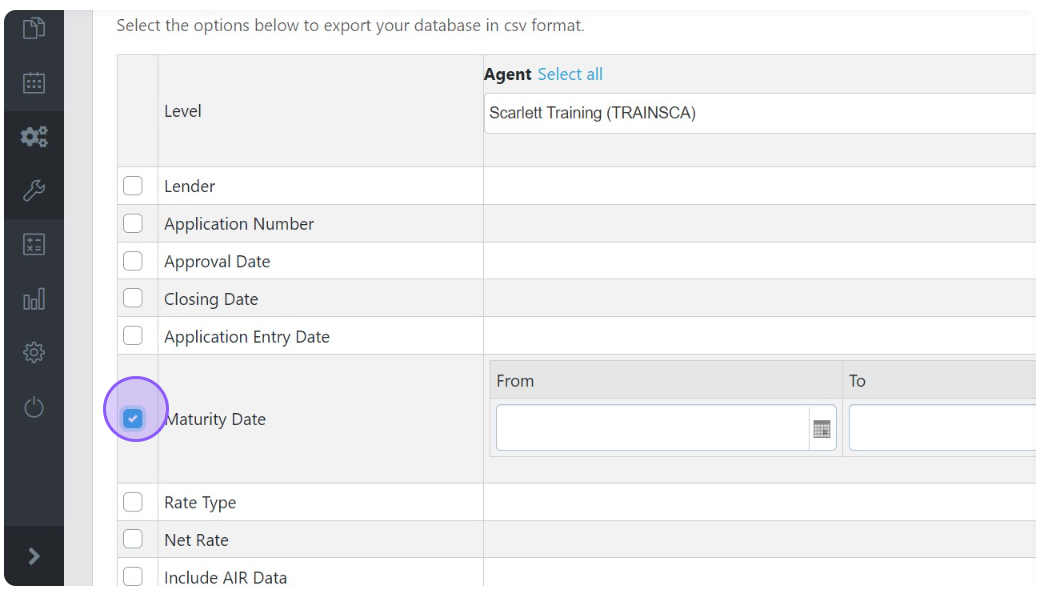
12) Click here to look through Maturity Dates
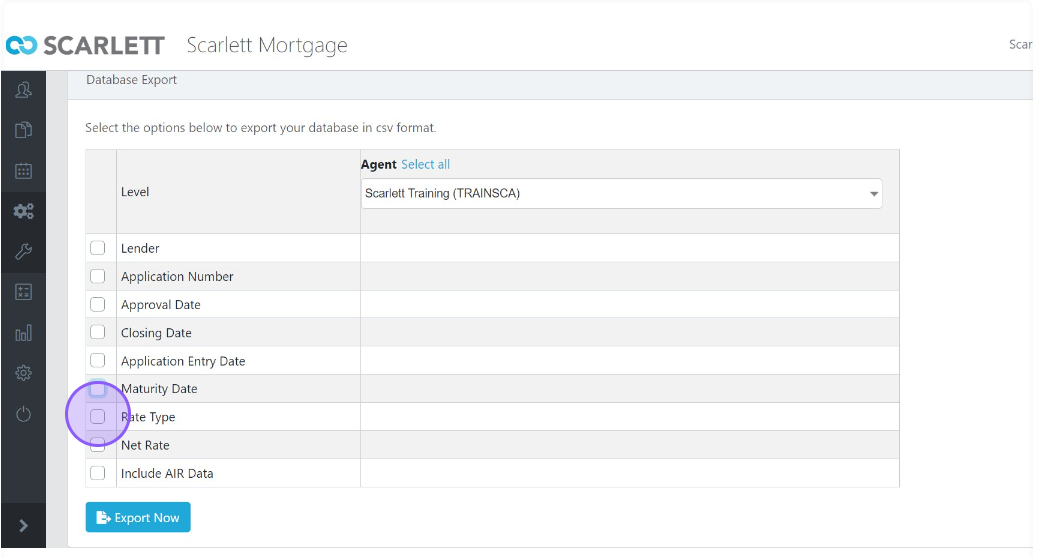
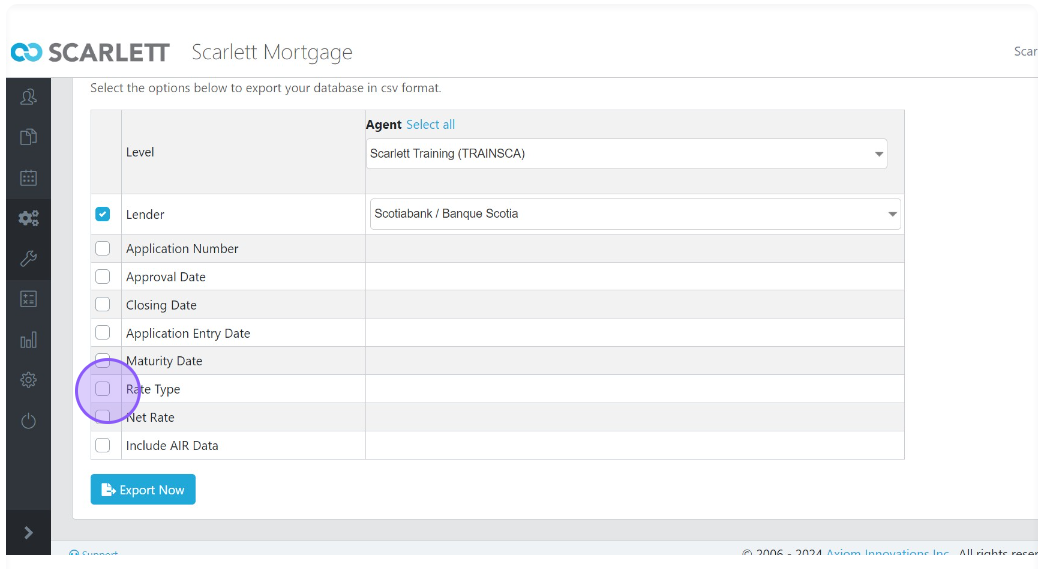
13) Click here for Rate Type
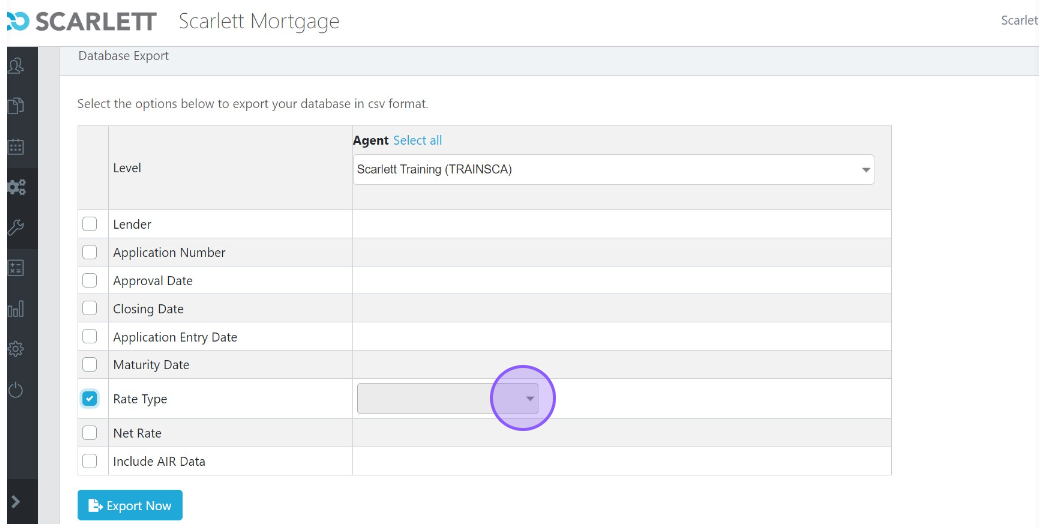
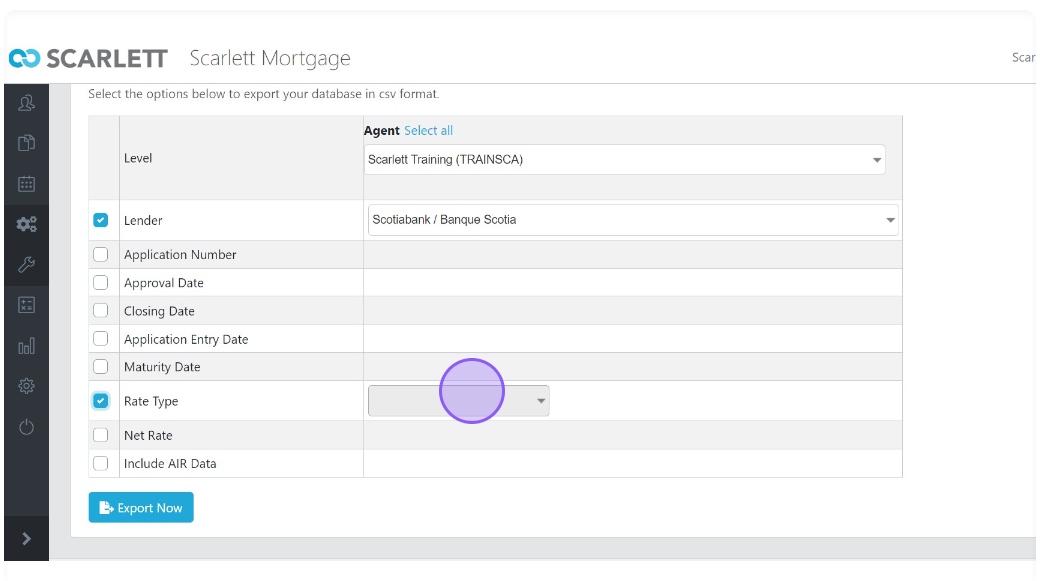
14) Click here to see the different Rate Types
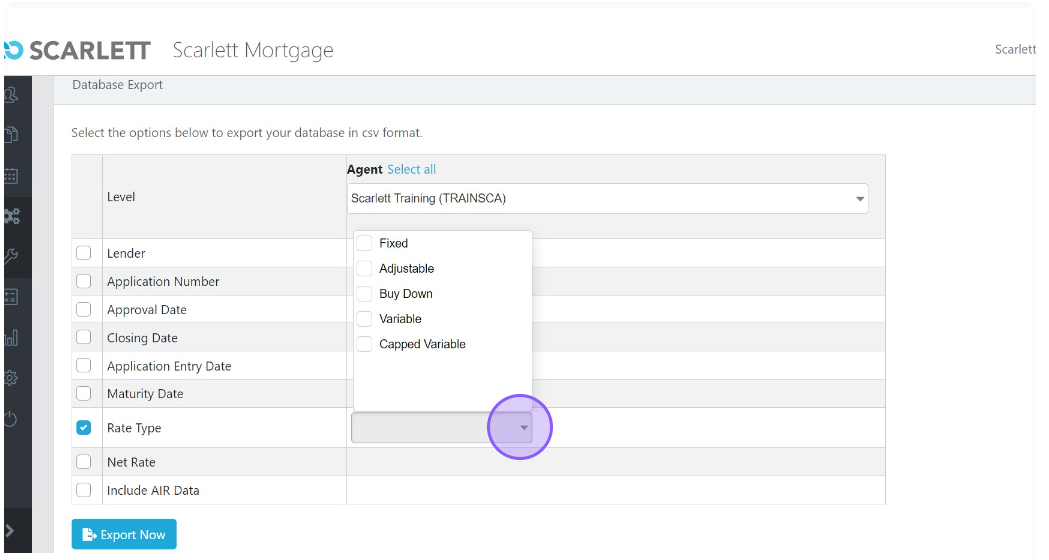
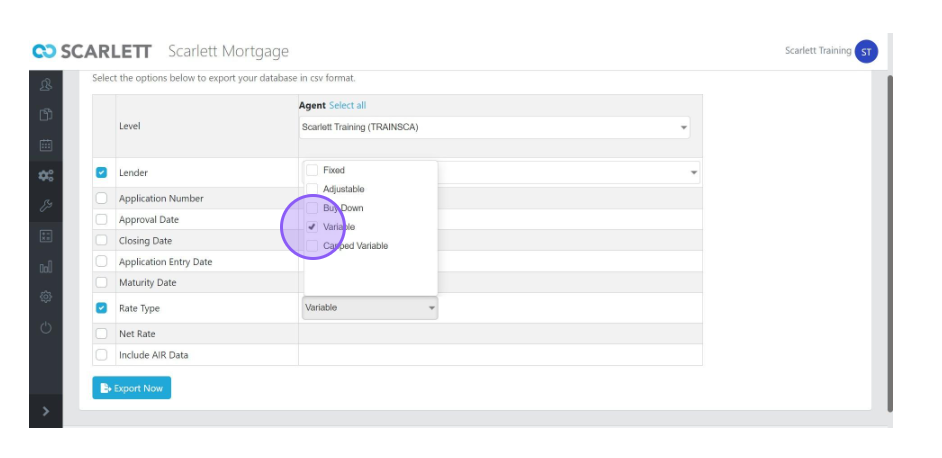
15) Here you can view the Rate Types
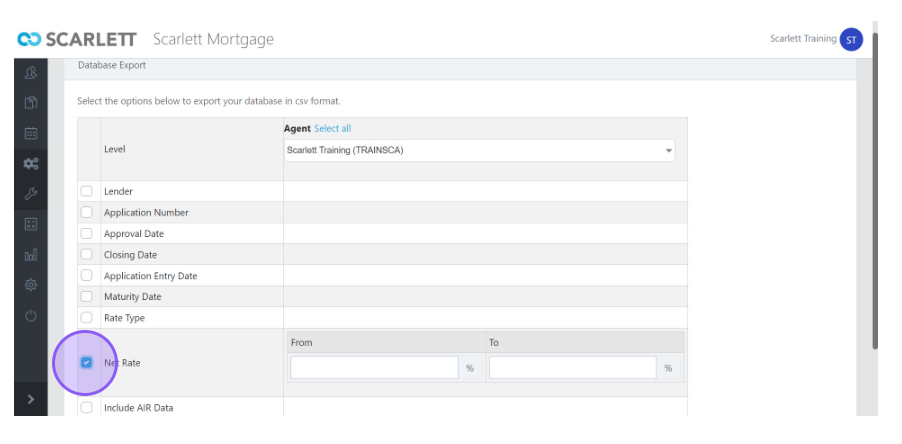
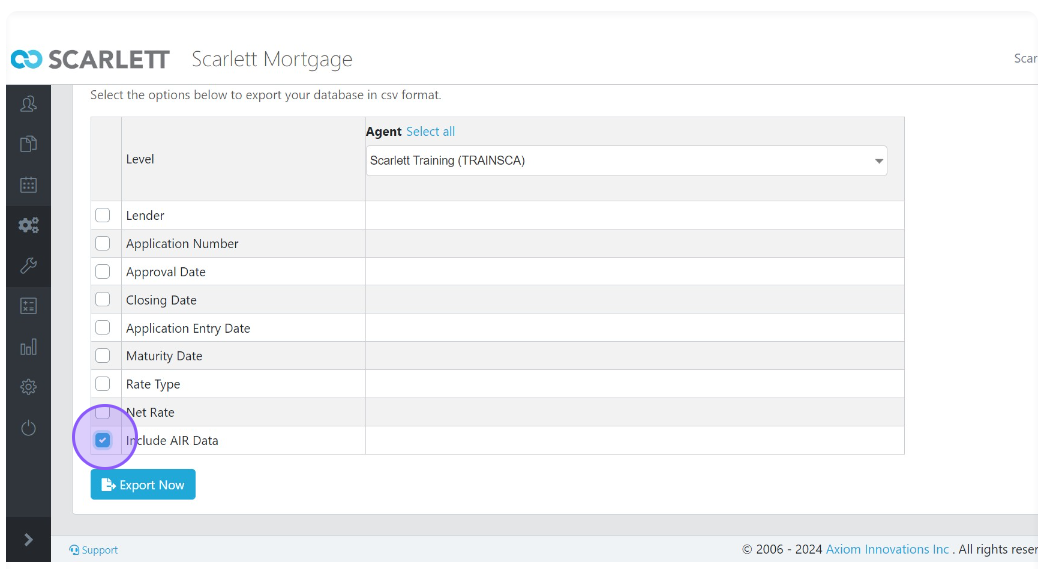
16) Click here for Net Rate
17) Click here to include AIR Data
18) To export data, click on the appropriate lender
19) Click here
20) For example, here we clicked "Scotiabank/ Banque Scotia"
21) Click here to choose the Rate Type you want
22) Click here
23) For example, you can click "Variable"
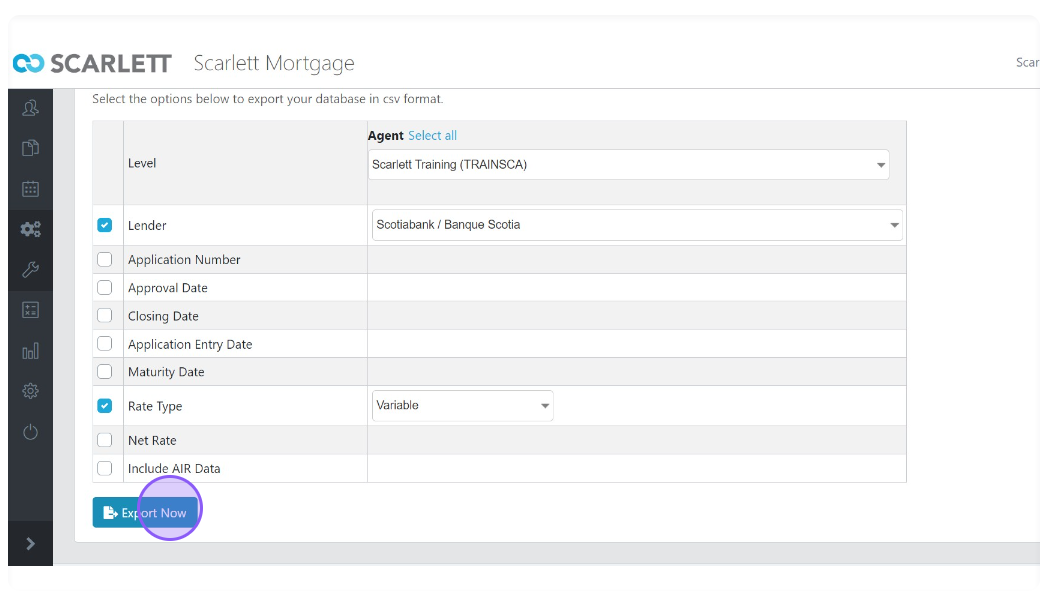
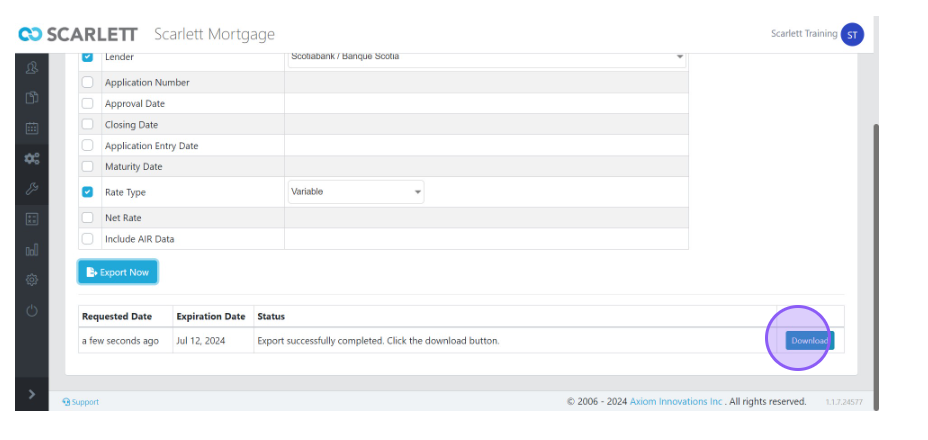
24) Click Export Now
25) Click "Download" to download it as a CSV file

