
Create & Send Documents for E-Signature
This guide provides step-by-step instructions on generating documents for e-signing, sending them, and reviewing and tracking their status. It covers everything from generating documents for e-signing, sending the documents for e-signing, and how to review and track the status of these documents. By following this guide, you will have a comprehensive understanding of the entire process of effectively managing your e-signature workflows.
Related Training
Video Walkthrough
Step-by-Step Guide
Setting up a Signing Package for E-Signature
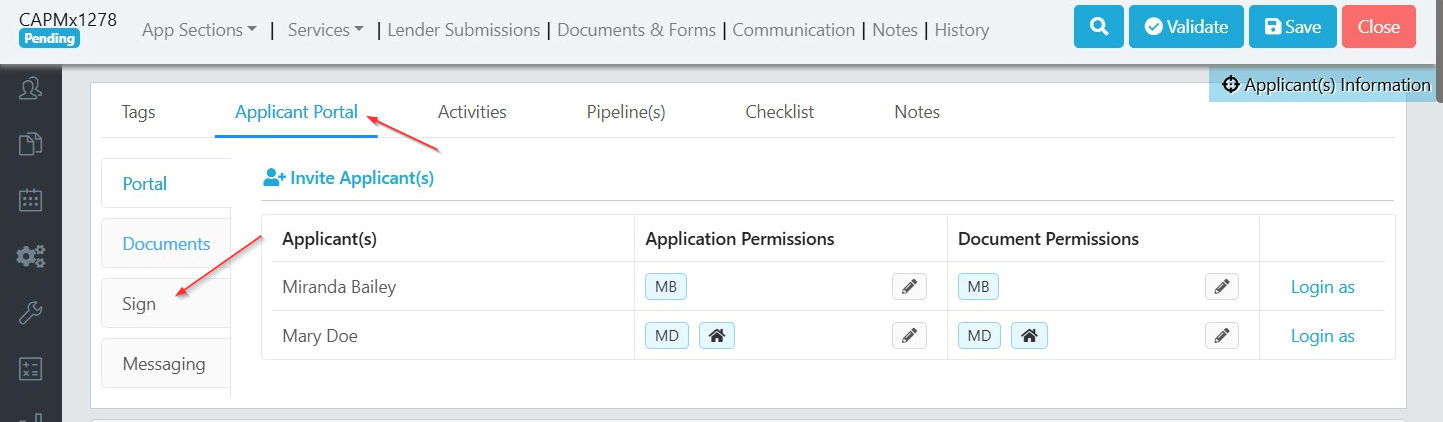
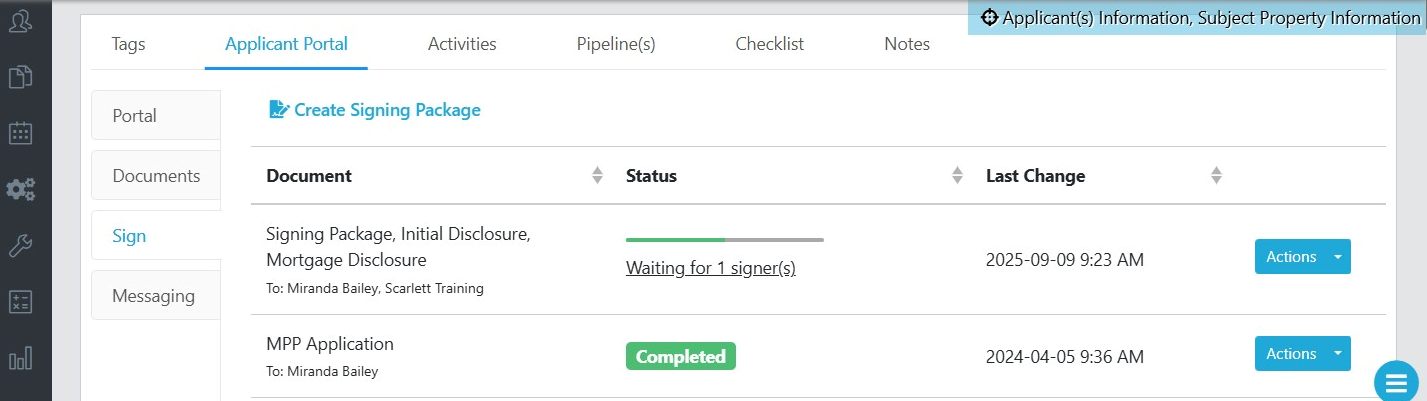
1) Within the Deal, select the Applicant Portal and click on "Sign".
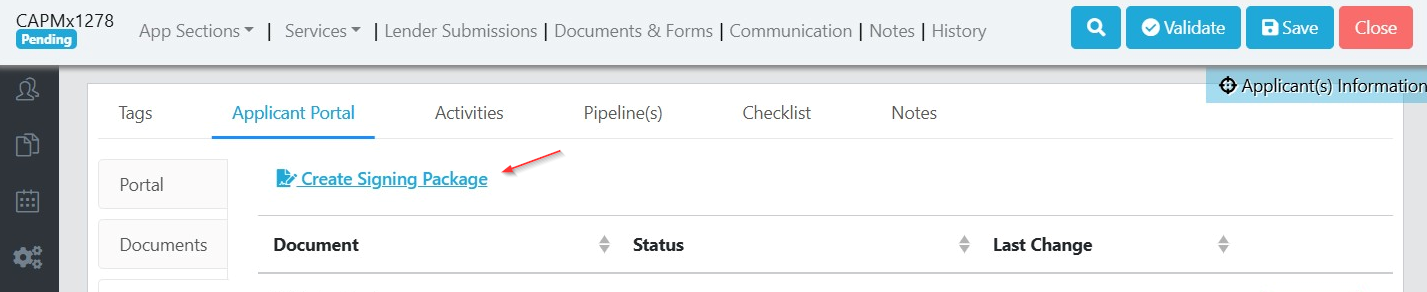
2) Click "Create Signing Package"
3) Select the documents from within your deal that you want to add to the signing package. You can re-order the documents by dragging them in the bottom section. When all documents are selected, click "Next".
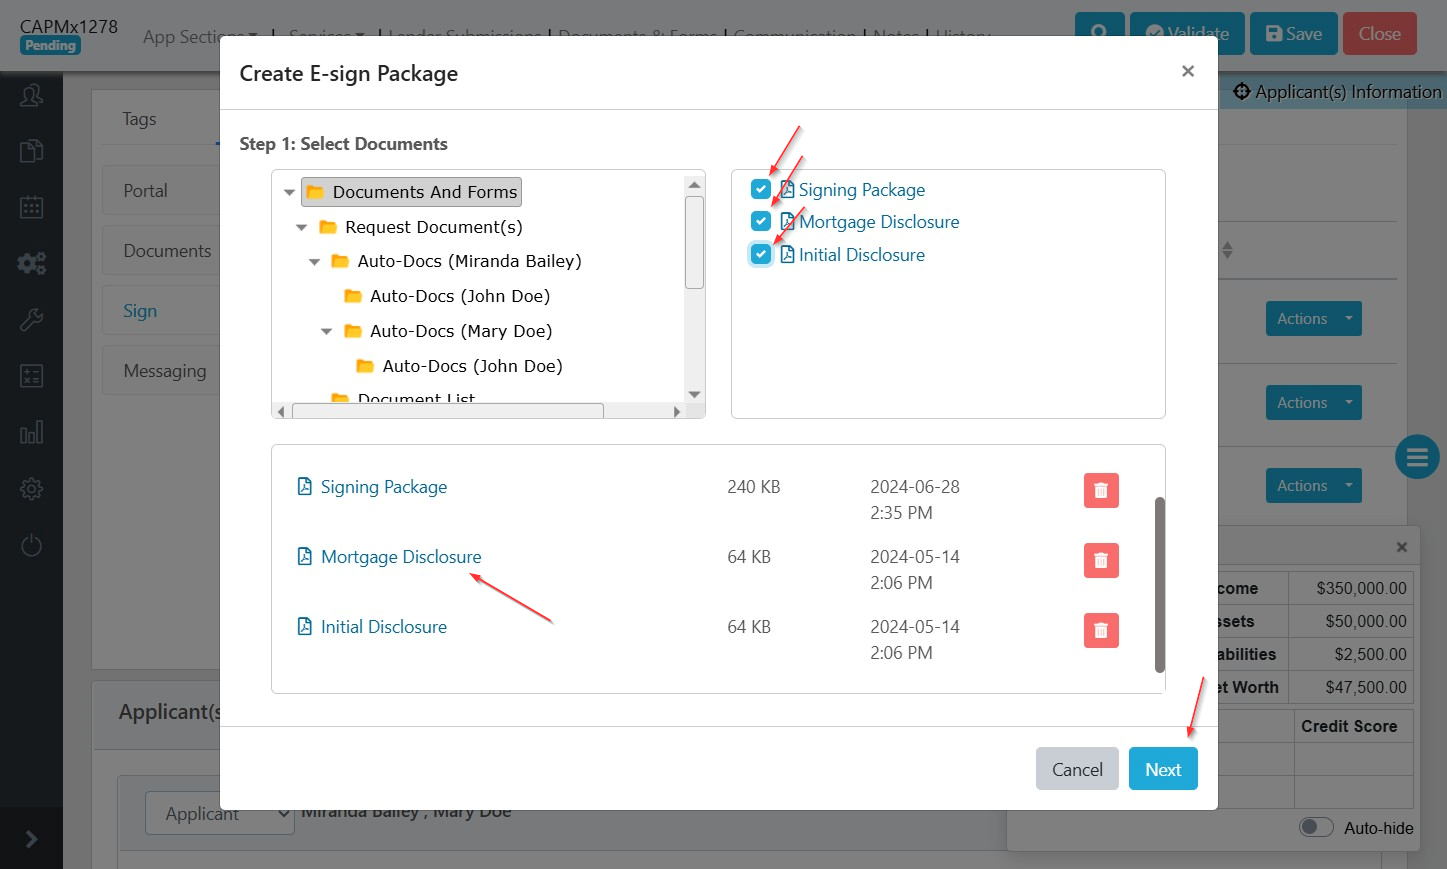
For instructions on how to create disclosures within the system, see the related training.
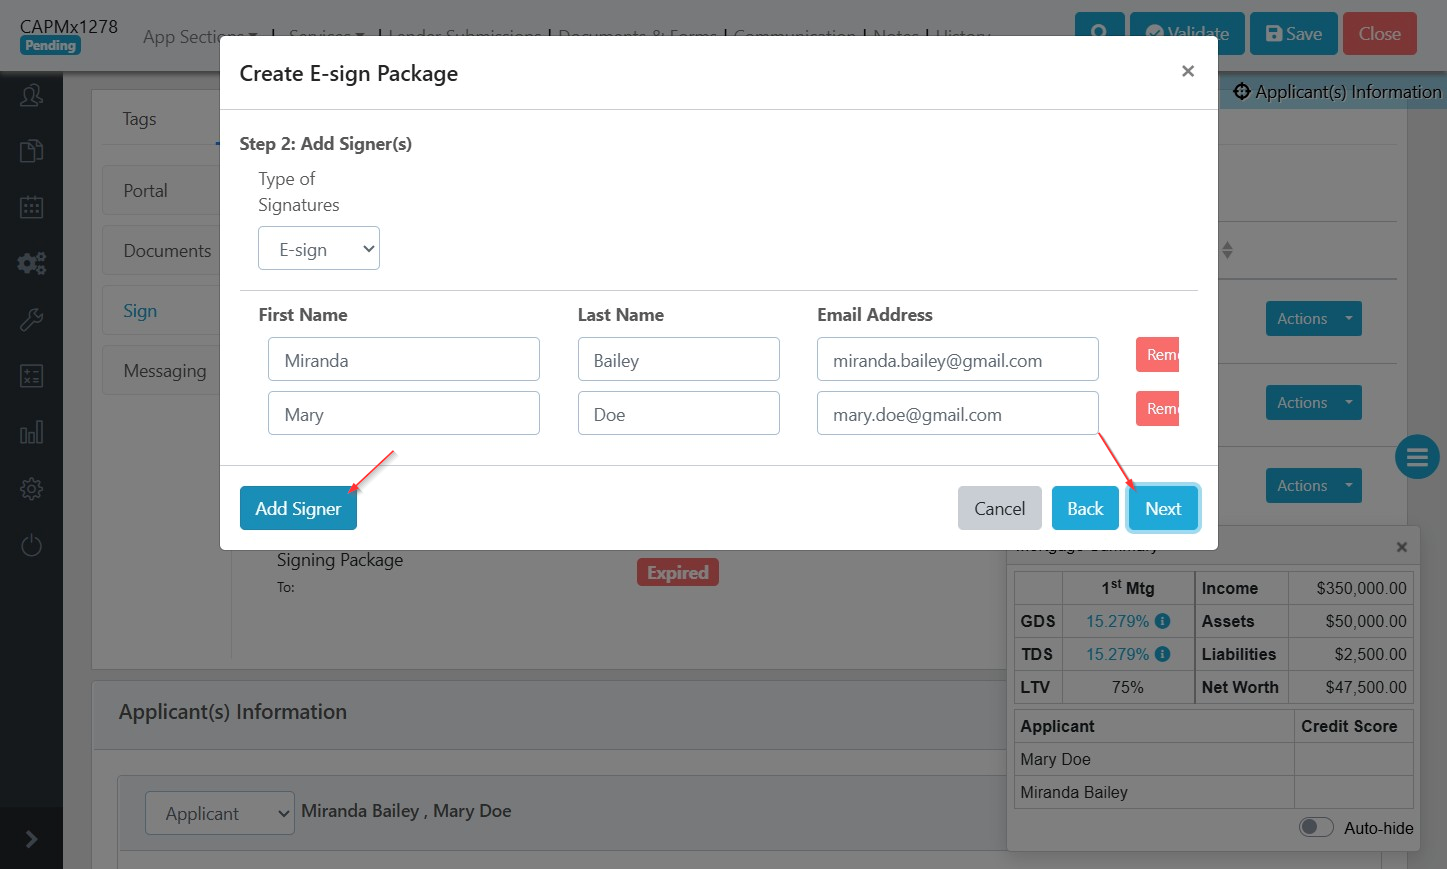
4) Verify your clients' email address(es). You can remove any applicants who do not need to sign this package.
If you need to sign documents, don't forget to add yourself using the "Add Signer" button.
5) Clicking "Next" will load the Docusign interface. Using the Fields on the left, set up your Document for E-Signature
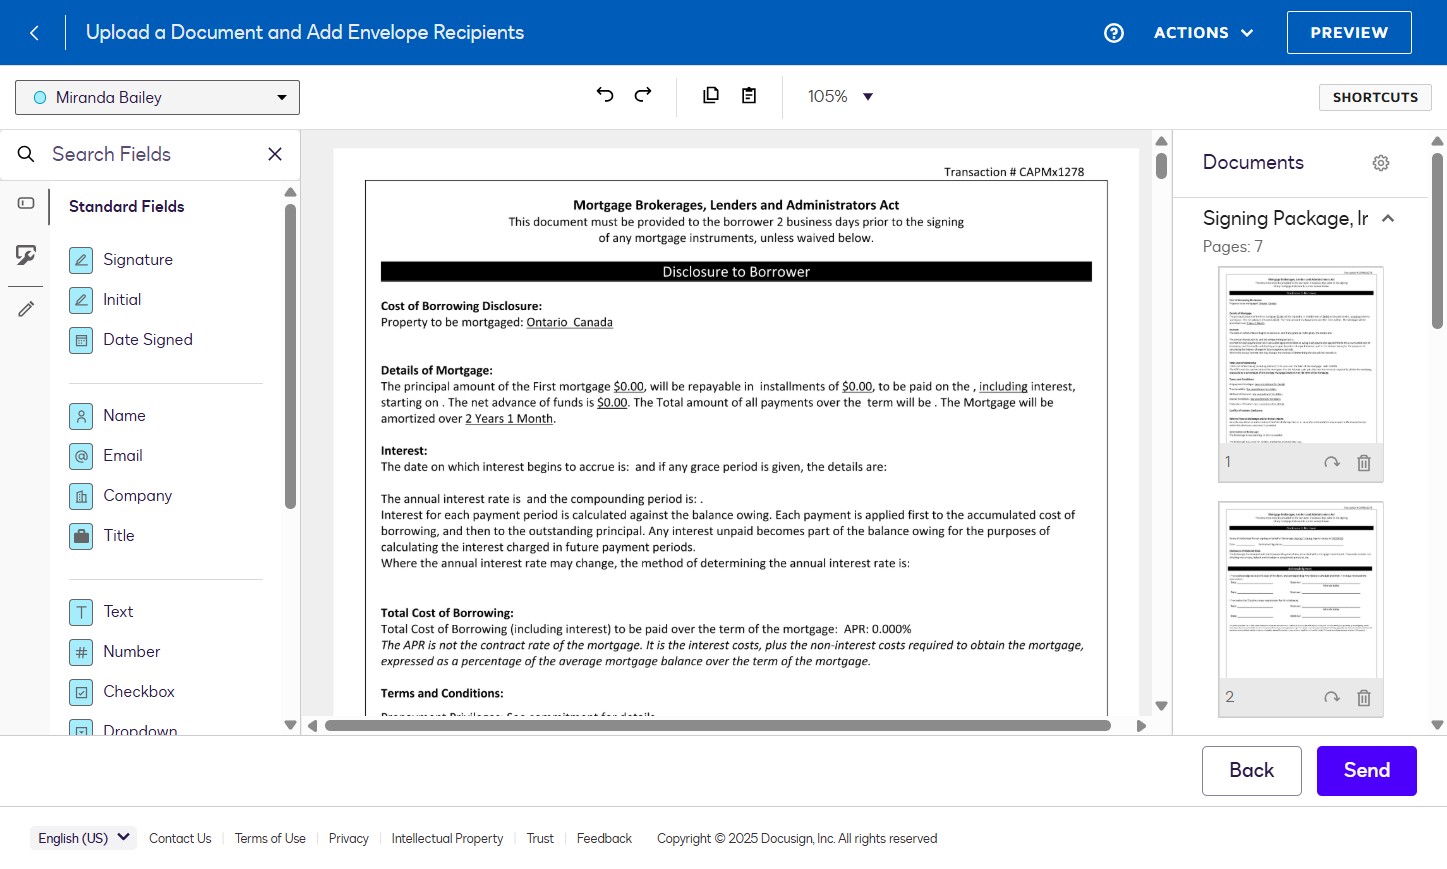
For detailed instructions on setting up a document for signature within Docusign, please see related training.
Populate & place all the required fields for each party involved. Ensure that the fields you input match the appropriate party. You can set fields to Required or Read-Only based on your needs.
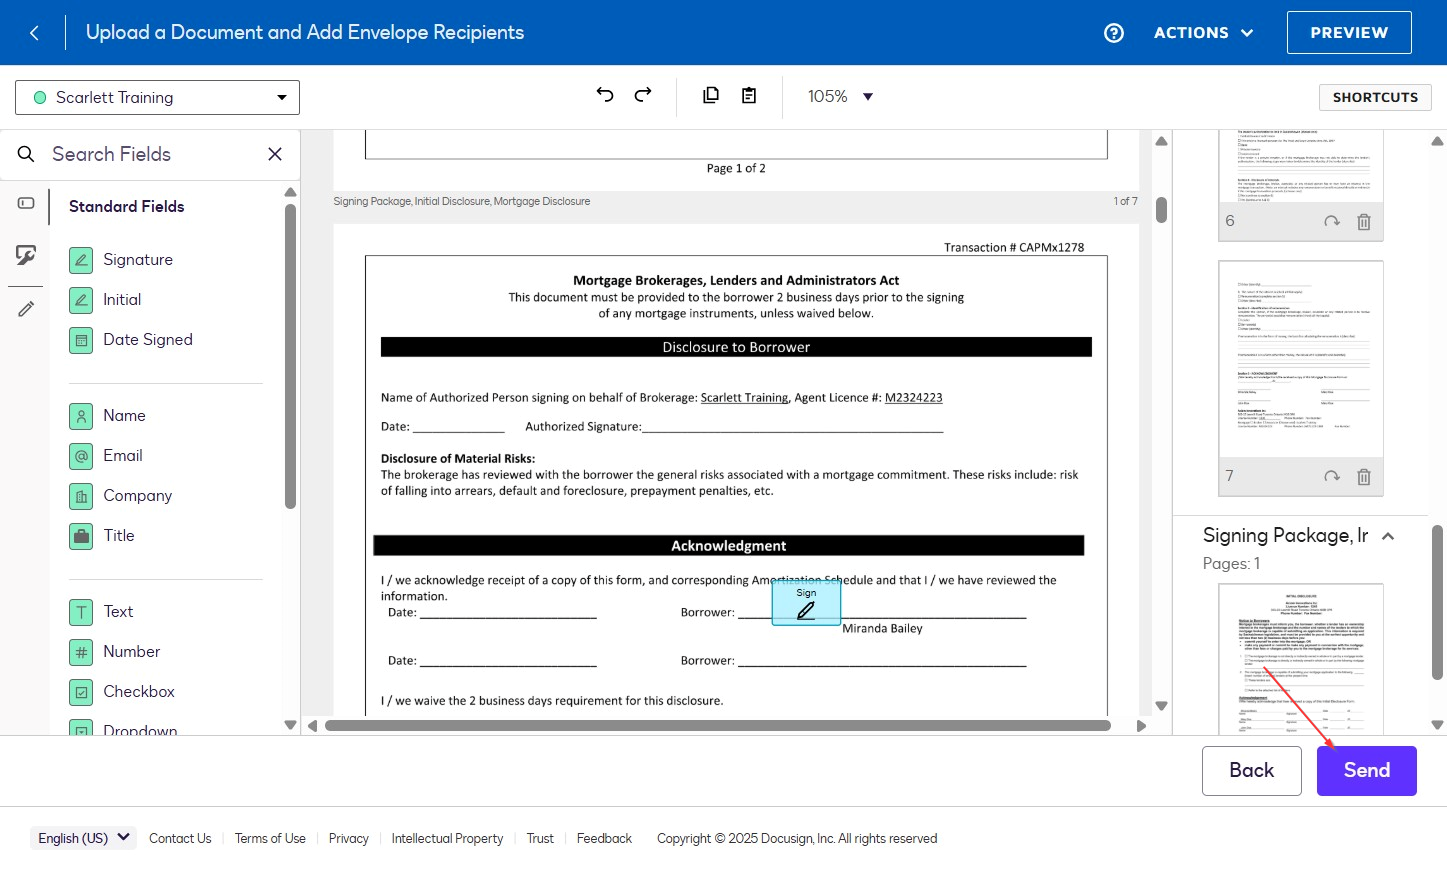
6) Once you're satisfied, select the "Send" button.
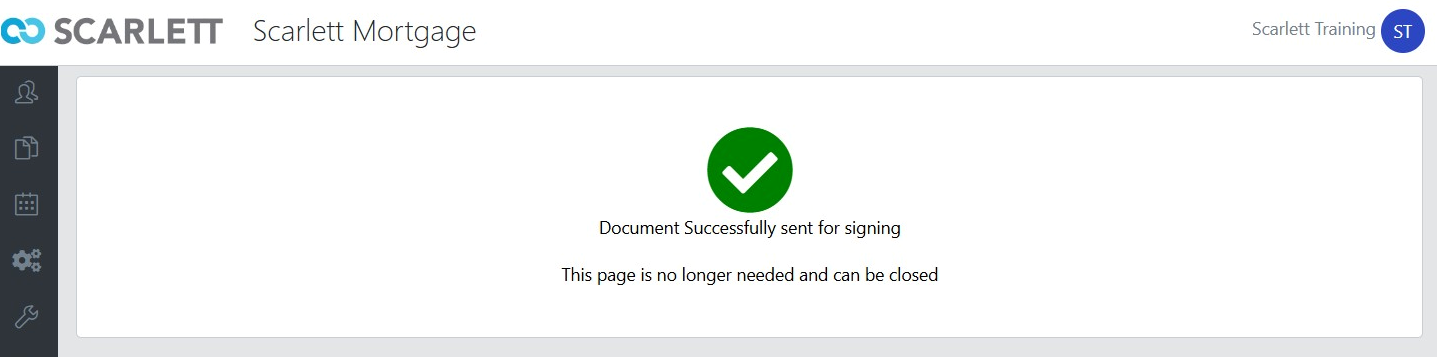
7) You will see this confirmation page that your documents have been sent for e-signature.
8) The system automatically generates electronic emails to each of the signatories.
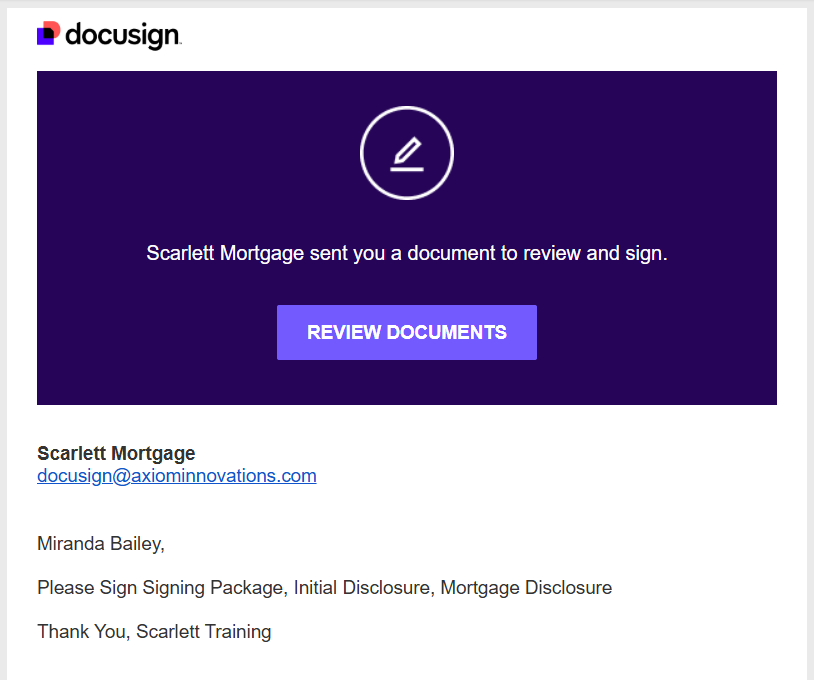
9) When they click "Review Documents", the recipient can continue to sign or open the other action dropdown and select another action including finish later, decline to sign, help and support, etc.
Checking E-Signature Status
1) Within the Deal, select the Applicant Portal and click on "Sign".

2) You can see the status of any e-signature request you have sent out on this file.
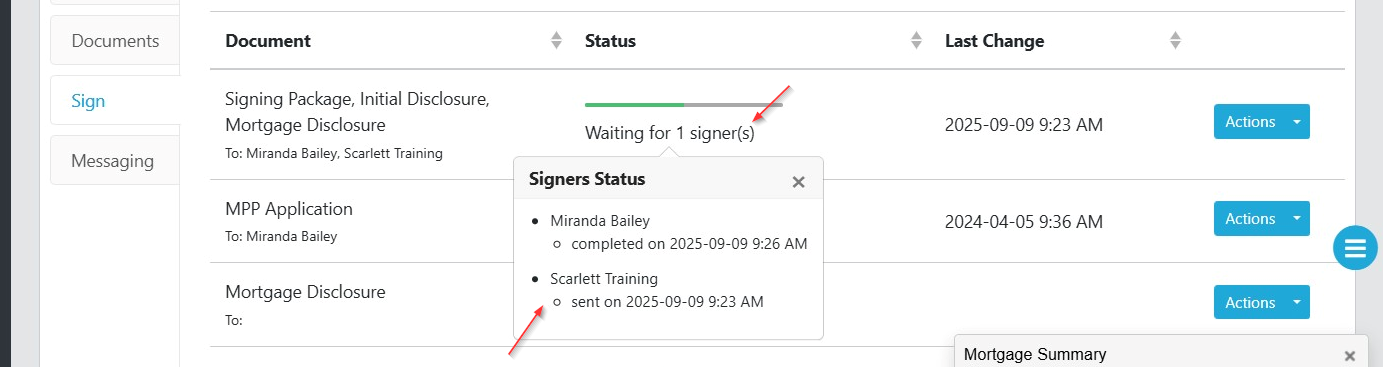
3) Click on the "Waiting for X signer(s)" to see details on who has signed, and who still needs to.
Resending a Signing Request
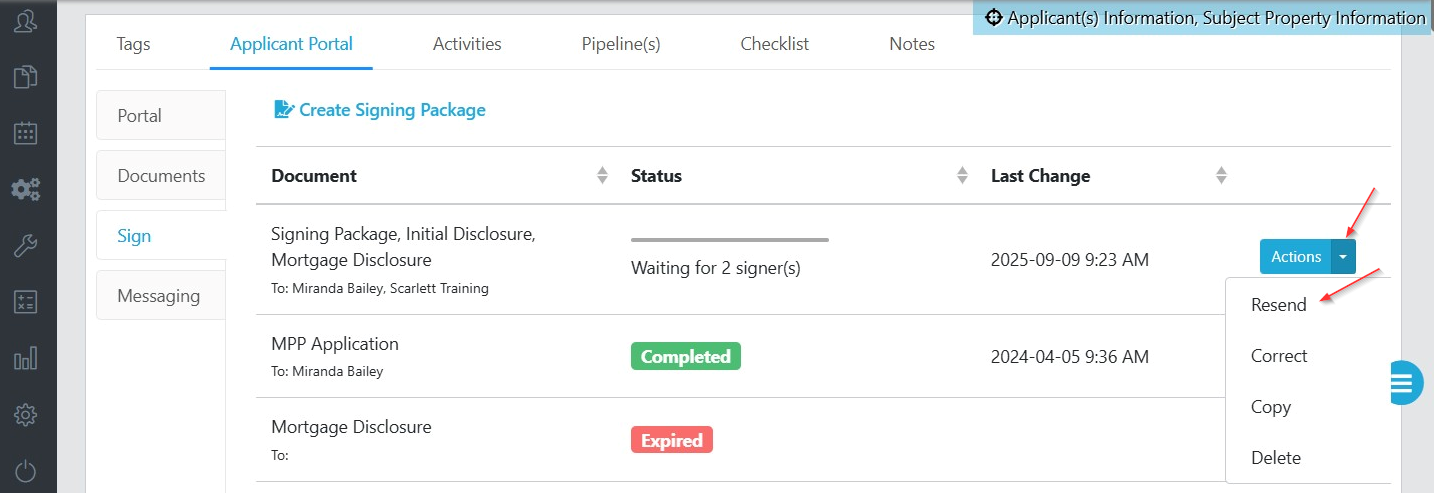
1) Within the Deal, select the Applicant Portal and click on "Sign".

2) From the Action dropdown next to the document you need to resend, click "Resend"
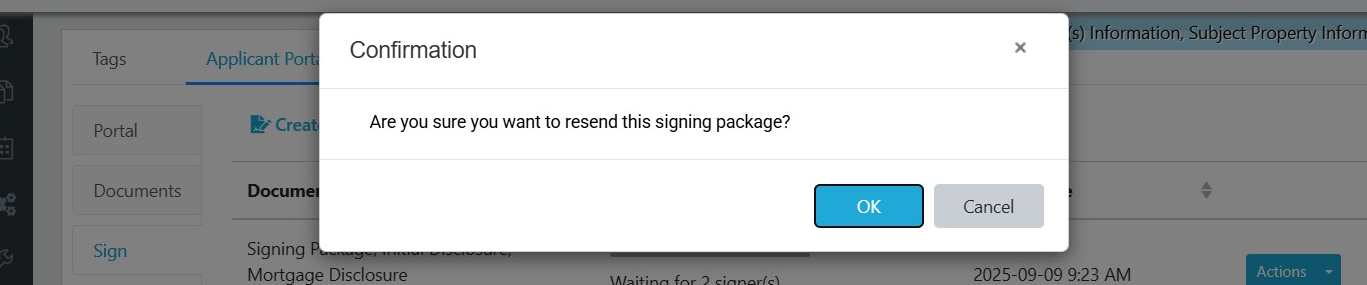
3) Click "OK" to send the invitation to signing.
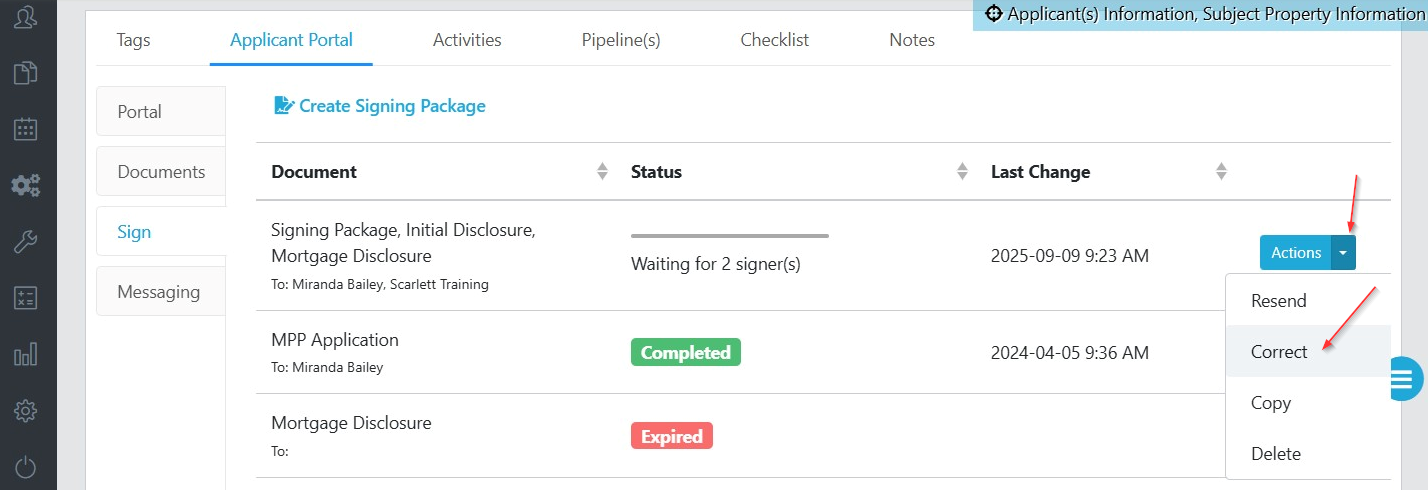
Correcting an e-signing Request
This option is available as long as at least one applicant has not completed their signatures.
1) Within the Deal, select the Applicant Portal and click on "Sign".

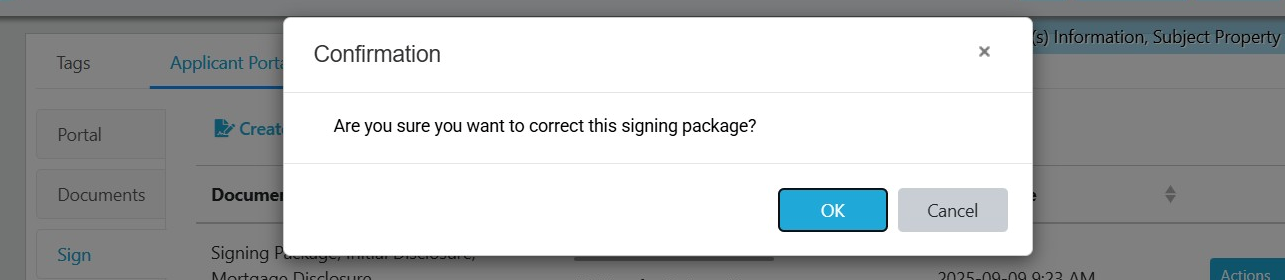
2) From the Action dropdown next to the document you need to correct, click "Correct"
3) Click "OK" to launch the Docusign window to make edits.
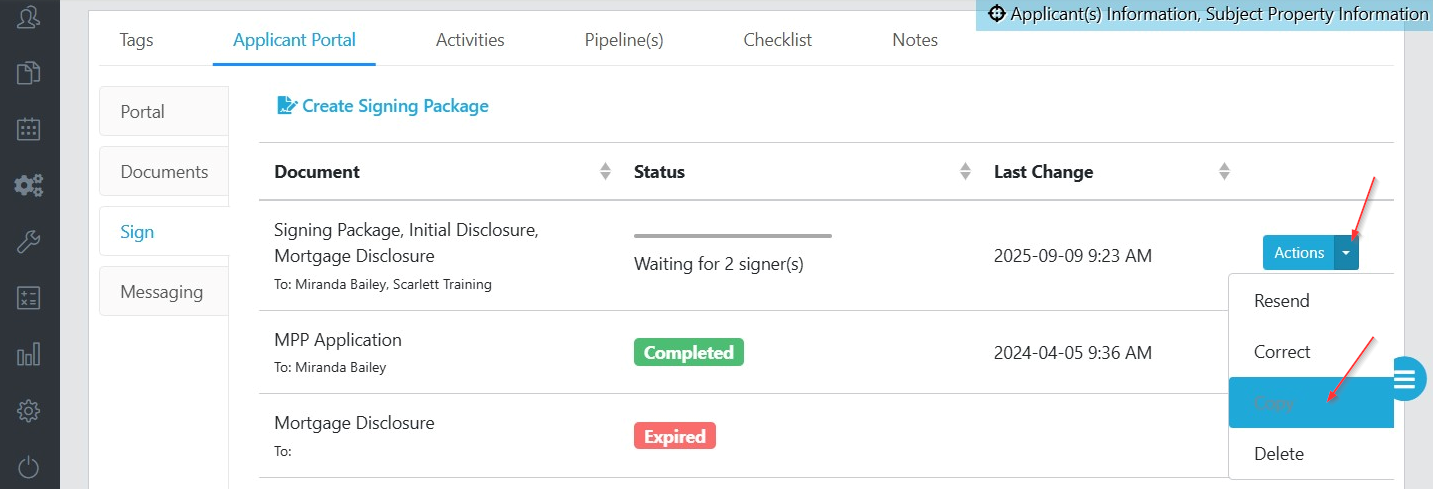
Create a Copy of a Signing Package
1) Within the Deal, select the Applicant Portal and click on "Sign".

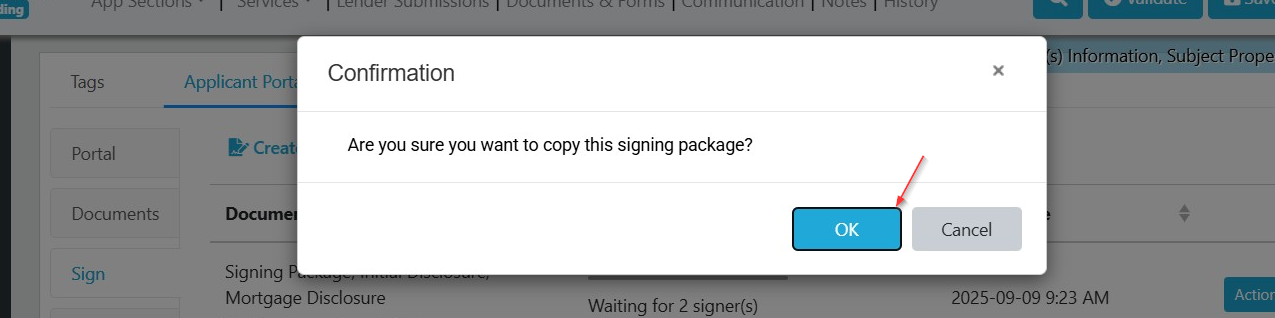
2) From the Action dropdown next to the document you need to copy, click "Copy"
3) Click "OK" to copy the signing package and launch the Docusign window.
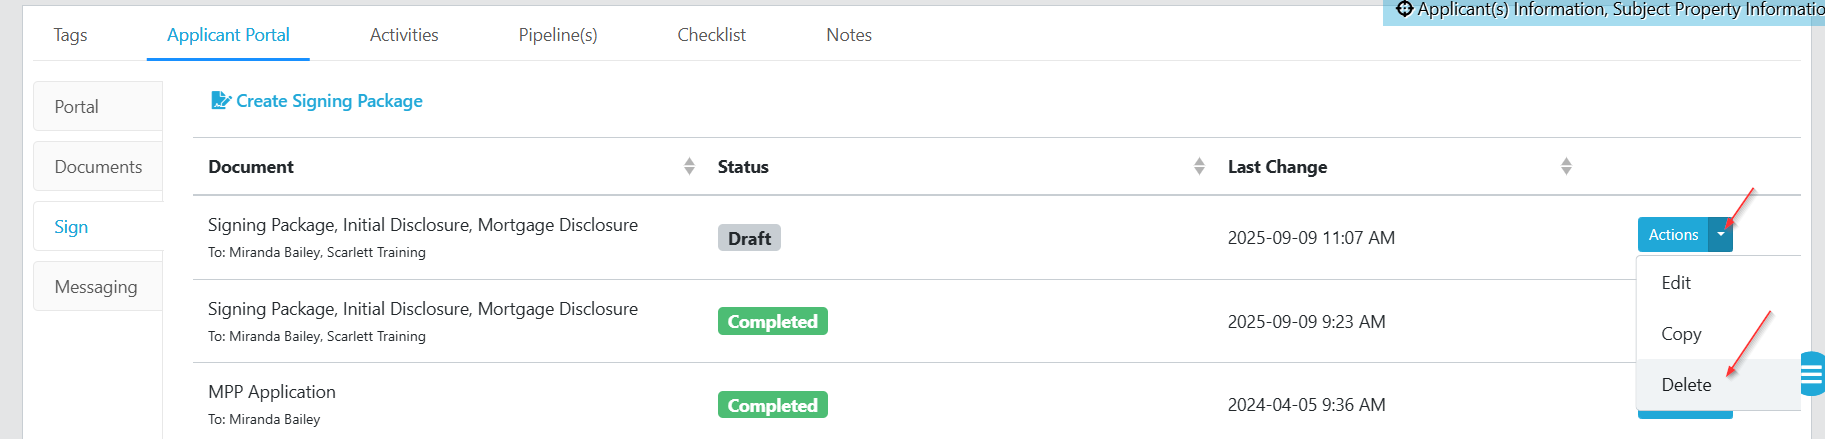
Delete a Docusign Request
1) Within the Deal, select the Applicant Portal and click on "Sign".

2) From the Action dropdown next to the document you need to delete, click "Delete"
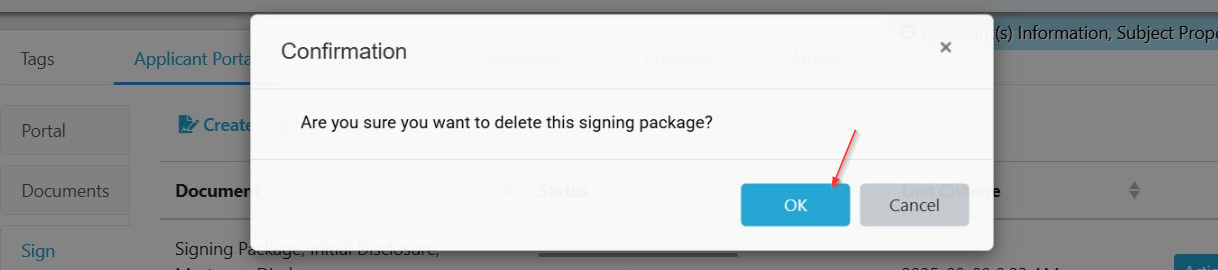
3) Click "OK" to delete the document.
Download Signed Documents
1) Within the Deal, select the Applicant Portal and click on "Sign".

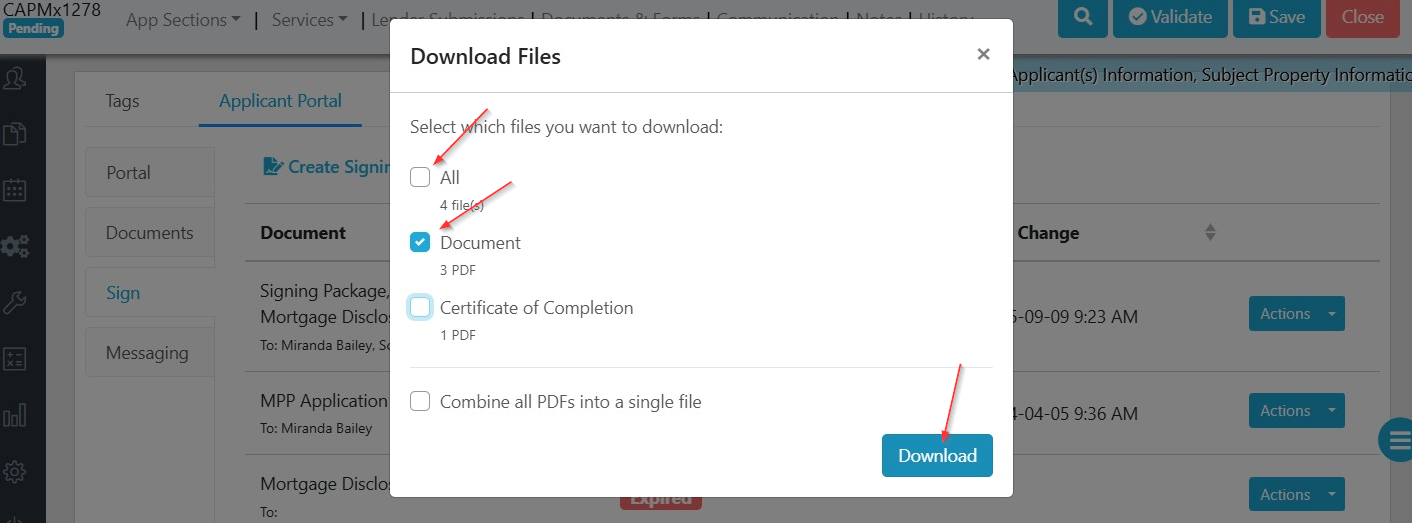
2) From the Action dropdown next to the document you need to download, click "Download"

3) Select whether you want to download all documents, just the signing documents, or just the certificate of completion. Then click "Download".
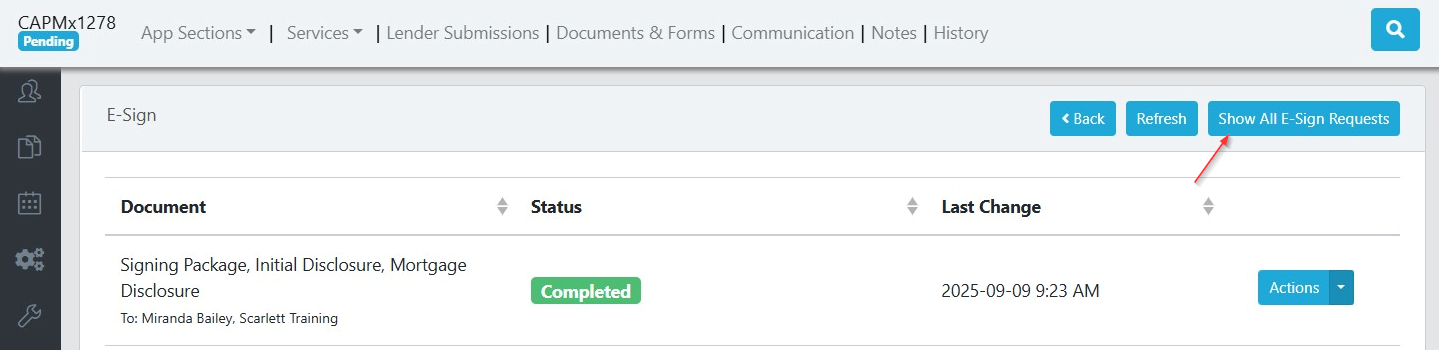
View All E-Signing Requests Across All Deals
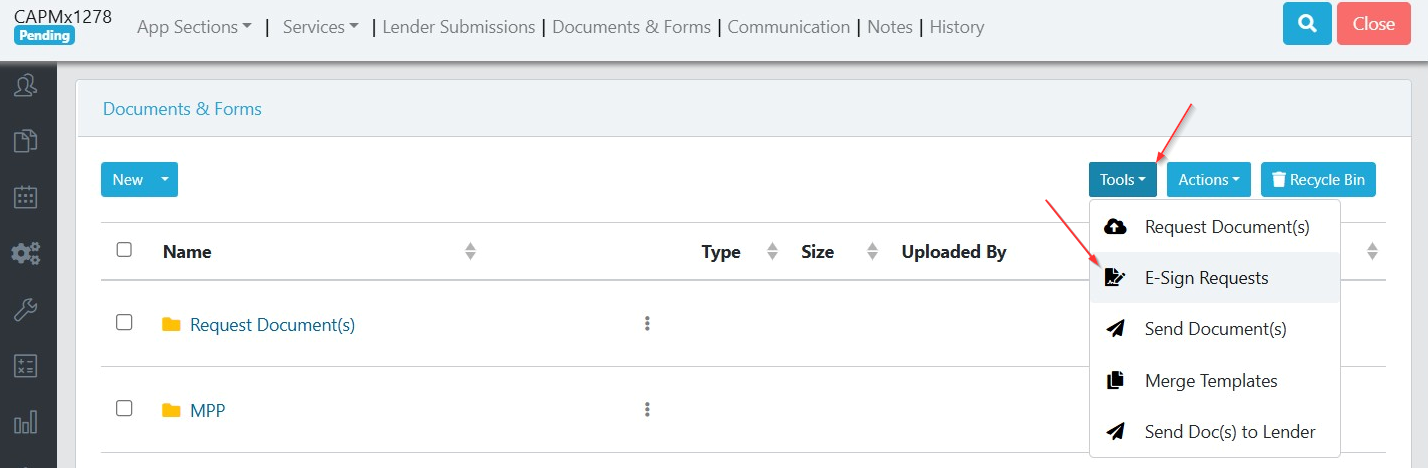
1) Within a deal, click on Documents & Forms

2) Select the "Tool" button, then select "E-Sign Requests"
3) Click "Show All E-Sign Requests"
4) This will display the status of all e-sign requests across all deals.
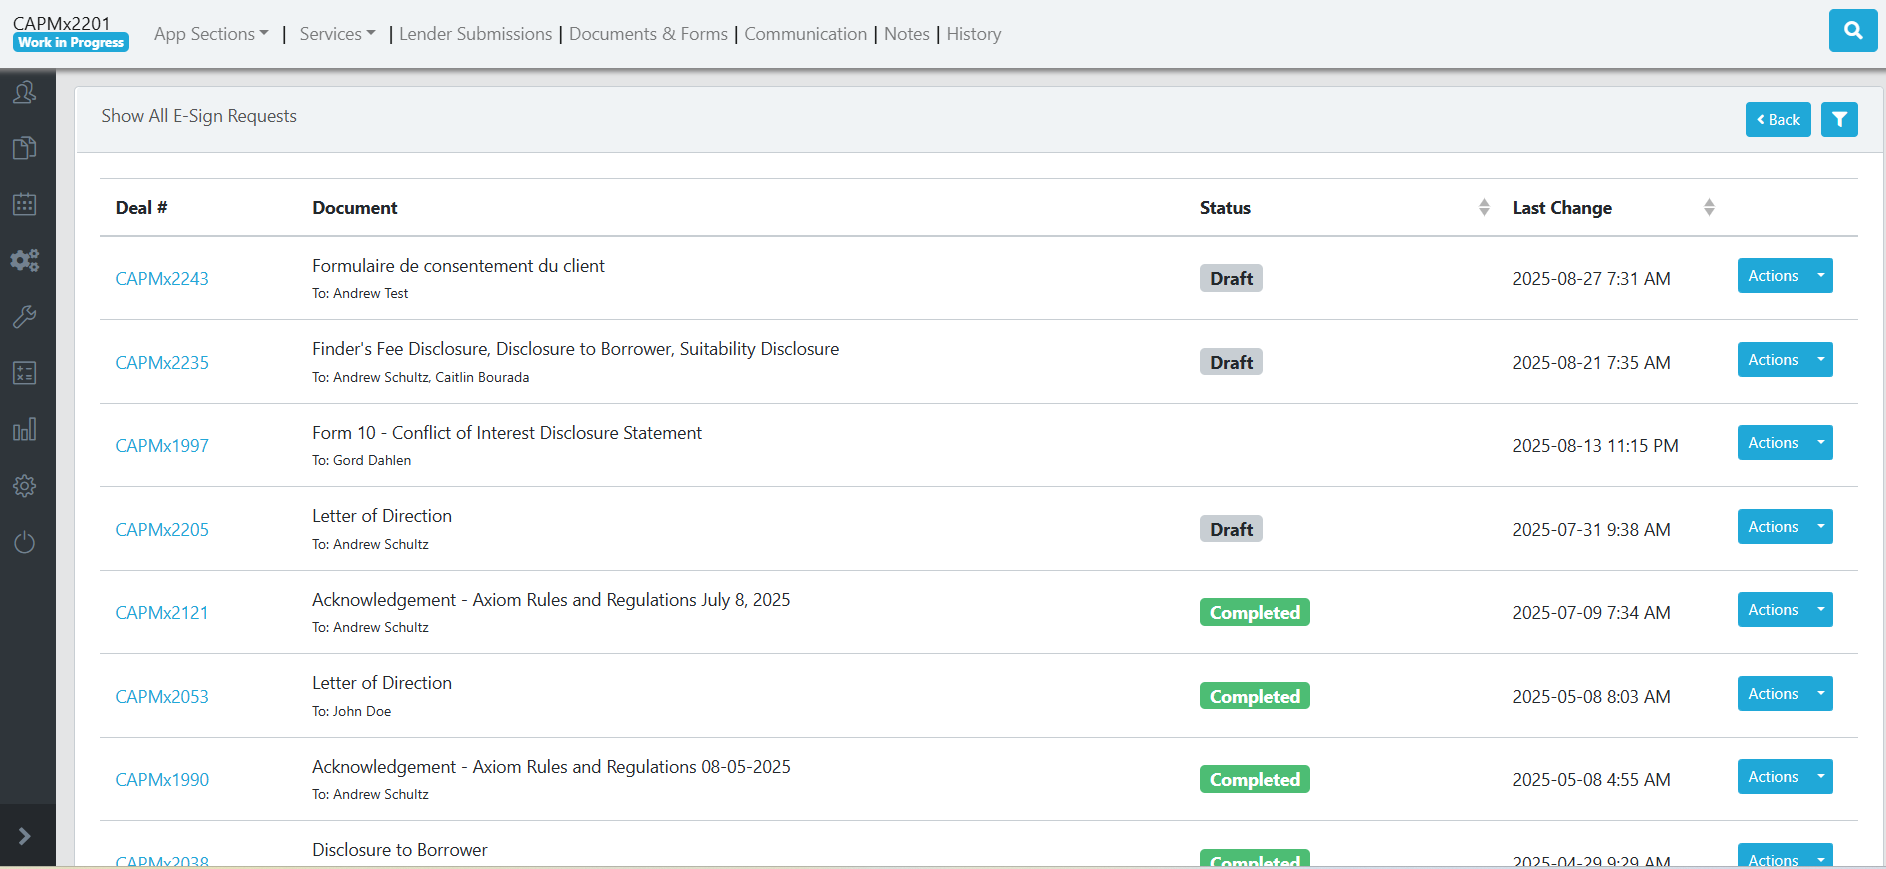
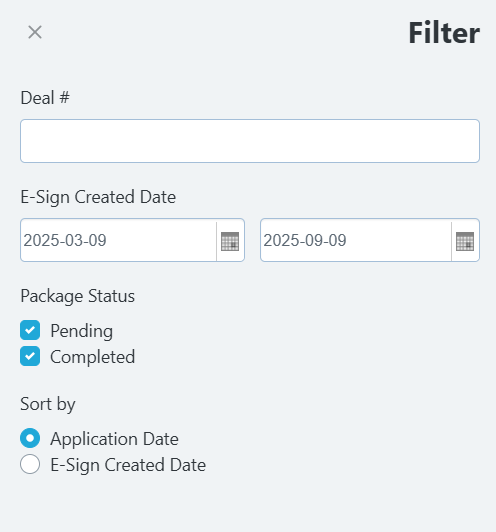
5) Click the filter icon to filter the results.

6) You can filter by deal number, date range, and package status. You can also change the sorting to order by application date or e=sign creation date.
Scarlett Tips
Don't have a document uploaded to Scarlett Mortgage, but need to include it in your e-signing package? You can add a document to an existing Docusign request.
1) Click the gear in the top right of the document list, and select "Edit Documents".
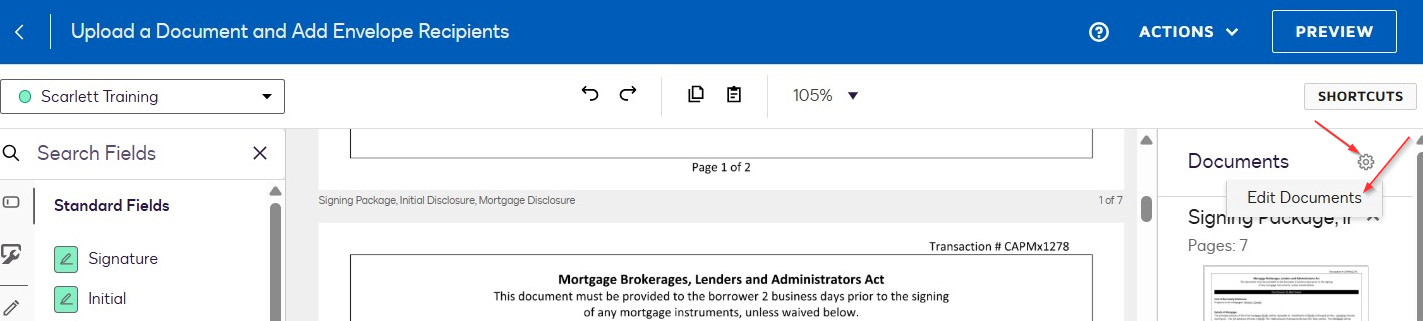
2) Add any required documents by uploading them here.

We still recommend that you upload your documents to Scarlett Mortgage. It will make doing your compliance easier later on.